VideoMic NTG on Camera Shotgun Microphone
VideoMic NTG - USER GUIDE & SUPPORT

USER GUIDE & SUPPORT

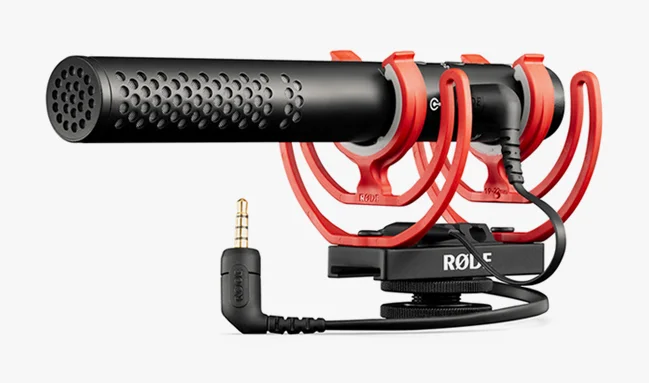
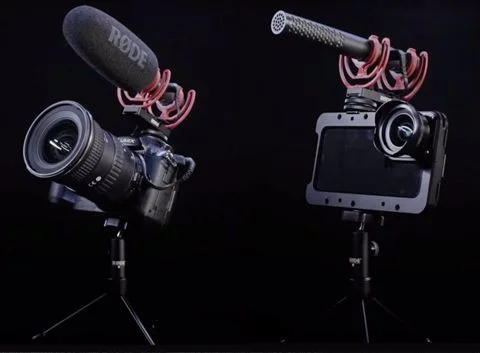
The VideoMic NTG is RØDE’s most versatile VideoMic ever. Bringing the signature broadcast-quality sound of the NTG shotgun mic range to a compact, feature-packed VideoMic, it’s the perfect audio solution for every kind of content creator.

Here’s everything you need to know about using your VideoMic NTG.

VideoMic NTG - USER GUIDE & SUPPORT

FEATURES

VIDEOMIC NTG AT A GLANCE

VIDEOMIC NTG AT A GLANCE
THE POWER/FUNCTION BUTTON

THE POWER/FUNCTION BUTTON

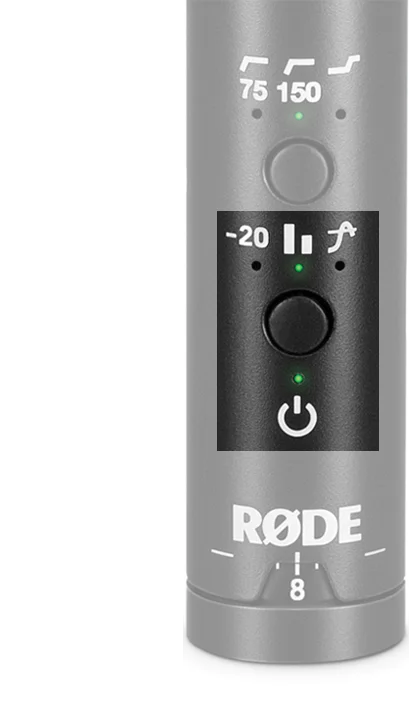
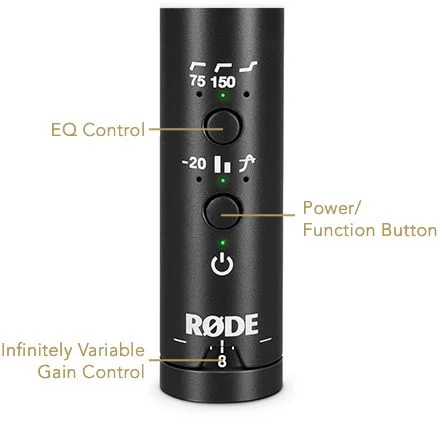
The first button on the VideoMic NTG manually turns the mic on/off and engages the -20dB pad and safety channel.
THE POWER/FUNCTION BUTTON

Powering the Mic On/Off

  • Press and hold for three seconds to manually turn the mic on/off.
The VideoMic NTG also has a handy auto power feature. By default, it will automatically power on when connected to a device, or when the connected device turns on, and power off when disconnected from a device, or when the device turns off. See here for more info.

The Pad and Safety Channel

The VideoMic NTG has a host of useful features for making sure your audio is clear and distortion-free when recording loud sound sources, including a -20dB cut (aka ‘pad’), and a safety channel, which records a second track at -20dB that you can substitute for your main track in post-production if it distorts.

  • Press the button once to engage the -20dB pad (left LED will illuminate)
  • Press once more to engage the safety channel (left LED will turn off, middle LED will illuminate)
  • Press and third time to engage both the pad and safety channel (both LEDs will illuminate)

Read more about using the pad and safety channel here.

Note: The safety channel does not work with devices that have a TRRS input, such as smartphones, as these inputs only support one channel of audio.

THE EQ CONTROLS

THE EQ CONTROLS

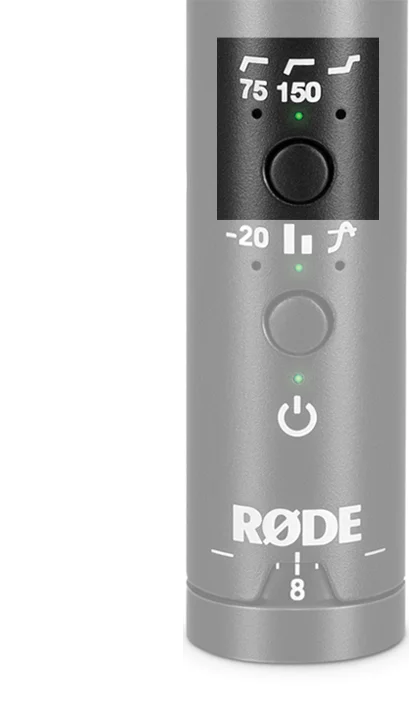
The second button on the VideoMic NTG controls three EQ functions, which makes it very versatile when recording in a variety of tricky conditions.
THE EQ CONTROLS

High-Pass Filters

There are two high-pass filters available. These will cut lower frequencies to help mitigate wind noise and other low frequency rumble (traffic noise, air conditioning etc).

  • Press this button once to engage the 75Hz high-pass filter (left LED will illuminate).
  • Pressing again to engage the 150Hz high-pass filter (middle LED will illuminate).
  • Press a third time to disengage both filters (left and middle LEDs will turn off).

Note: The 150Hz filter will cut more bass frequencies, so this is suitable in more adverse conditions.

High Frequency Boost

There is also a high frequency boost for enhancing clarity and detail in your recording (particularly handy if you are using a windshield, which can make recordings sound muffled).

  • Press and hold the button to engage the high frequency boost (right LED will illuminate).
  • Press and hold again to disengage the high frequency boost.

Note: This can be used in conjunction with the high-pass filters for even greater flexibility when recording.

THE PEAK WARNING LIGHT

THE PEAK WARNING LIGHT

The peak warning light is simple: it will flash red when your signal is clipping, indicating that you need to either apply the -20dB pad and/or safety channel, or tell your talent to lower their voice.

THE PEAK WARNING LIGHT
The POWER LED

The POWER LED

This LED indicates the power status of the VideoMic NTG.

Green = Full charge

Amber = Medium charge

Red = Low charge

Flashing red = Very low charge

When connected to a computer, blue indicates the connection has been established and green indicates the mic is fully charged.

THE USB OUTPUT

The USB output on the VideoMic NTG has three main functions.

THE USB OUTPUT

THE USB OUTPUT

The USB output on the VideoMic NTG has three main functions.

charging

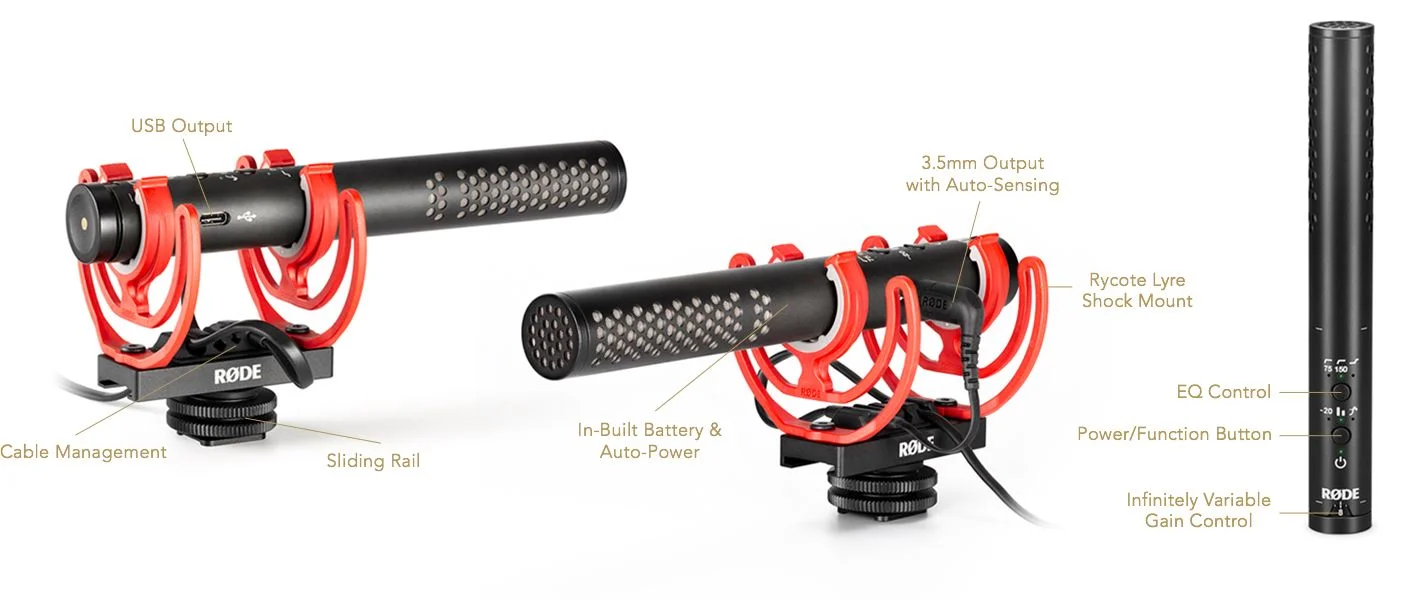
The VideoMic NTG’s internal lithium-ion battery can be charged by simply plugging it into any USB power source such as a computer, USB wall socket, or portable power pack. Charging from empty to full takes around two hours.

firmware updates

Yes! The VideoMic NTG can be updated and enhanced via firmware updates! Download the firmware updater here and watch how to update your mic.

recording

As well as being a hugely versatile on-camera microphone, the VideoMic NTG is also a fully featured USB microphone for recording direct into a computer or tablet!

  • Plug it into your computer or tablet (it’s a class-compliant device, so no drivers or software needed!)
  • Select it as your input and output device on your device’s system preferences and/or DAW.
  • Plug your headphones into the 3.5mm output to monitor your audio and adjust the mic’s gain knob to set your levels (you may need to set it above 10 to get a comfortable level)
  • Hit record!
THE 3.5MM OUTPUT AND AUTO-SENSING FEATURE

THE 3.5MM OUTPUT AND AUTO-SENSING FEATURE

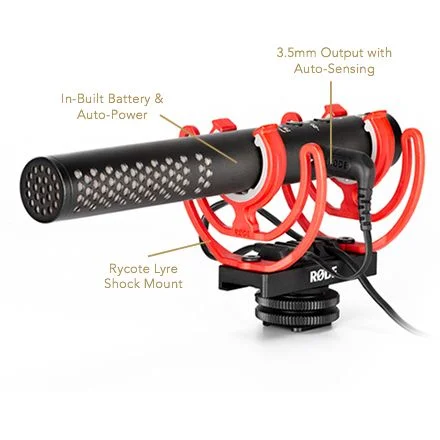
The VideoMic NTG’s output is a 3.5mm TRRS output and it comes with an SC10 TRRS to TRRS patch cable for connecting to cameras, smartphones, and other recording devices. The output features intelligent circuitry that automatically detects whether your microphone is plugged into a TRS input (found on most cameras) or a TRRS input (which most smartphones and tablets have) and switches to accommodate. No need to mess around with TRS to TRRS adaptor cables!

As mentioned above, the 3.5mm output also acts as a headphone output for monitoring your audio when using the VideoMic NTG as a USB mic.

THE BATTERY AND AUTO POWER

THE BATTERY AND AUTO POWER

THE BATTERY AND AUTO POWER

the battery

The VideoMic NTG features an in-built lithium-ion battery that provides 30+ hours of recording and charges via USB-C (from empty to full in two hours) The internal battery is not user replaceable. However, the mic has a 10-year warranty once it has been registered. If there are any issues with the battery within this timeframe, simply contact the RØDE support team and we’ll replace it.

The Auto Power Function

The auto power function a handy feature that automatically turns the microphone off when it detects that your recording device is switched off, helping conserve battery life, and turns it on when the device is turned on, so you never have to worry about missing a take. The auto-power function only works if your device delivers plug-in power (most do) – this is what tells the microphone if the device is on or off – or if you are using the microphone in USB audio mode.

Note: If you manually switch the mic on using the power button, then plug it in into a device or turn the device on, you will also need to manually turn it off when you no longer need it as the auto-power feature will not do it for you.

THE SHOCK MOUNT

THE SHOCK MOUNT

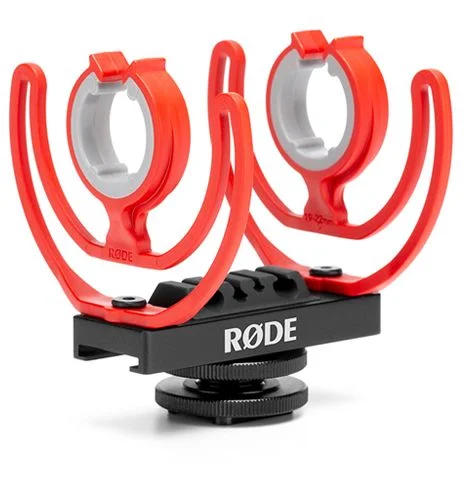
The VideoMic NTG comes with high-quality shock mounting with a variety of configuration options

THE SHOCK MOUNT

Rycote® Lyre® Shock Mount

Rycote Lyre is made from extremely hard-wearing thermoplastic and will never wear out, sag or snap. It provides excellent isolation from external physical factors that may cause unwanted rumble and vibrations in the microphone.

Cable Management

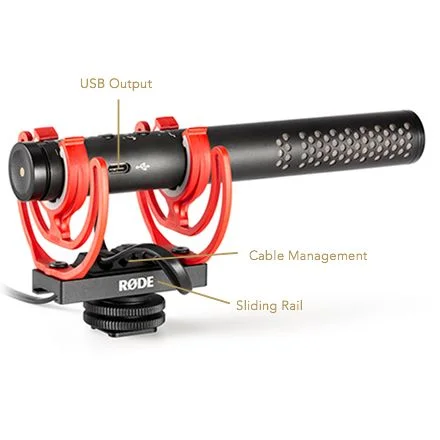
There is a cable management system with snug slots to accommodate your favourite type of cable, no matter the size. 

Sliding Rail

Loosen the screw to slide the microphone back or forward on its rail – ideal if you need to move the mic away from your face when shooting, out of frame, or balance it perfectly on a gimbal.

Threaded Cold Shoe

The VideoMic NTG can be easily mounted onto a boom pole, tripod or desk stand with the standard 3/8” thread on the bottom of the cold shoe.

USING THE VIDEOMIC NTG

RECORDING IN WINDY ENVIRONMENTS

RECORDING IN WINDY ENVIRONMENTS

RECORDING IN WINDY ENVIRONMENTS

The VideoMic NTG has been designed to deliver spectacular sound in a wide range of applications and environments. There are two high-pass filters available on the mic – one at 75Hz and 150Hz. Activating either of these will cut the frequencies below these points (hence you may hear them referred to as a “low cut”). Wind and other environmental noise such as traffic or air conditioners typically occupy low frequencies that will sound like a rumble in your recordings, which is quite unpleasant to listen to. Applying a high-pass filter will help curb this issue.

Engaging the 75Hz high-pass filter will cut frequencies below this point. This is suitable for mildly windy conditions or environments where there is a small amount of low frequency rumble (traffic outside your window, for example). Engaging the 150Hz high-pass filter will cut more low frequencies. This is suitable for windier conditions.

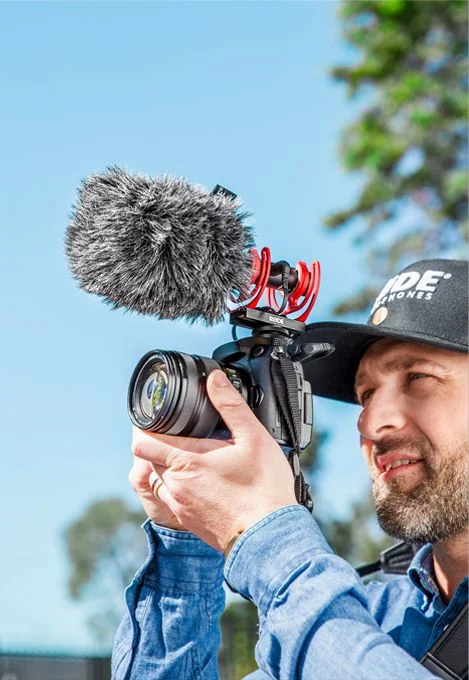
The VideoMic NTG also comes with a high-density foam windshield and is compatible with the WS11 furry windshield (sold separately). We recommend engaging the high frequency boost when using a windshield. This will enhance detail and clarity in your recordings, reducing the dulling effect that using a windshield can have. And remember, you can use the high-pass filters in conjunction with the HF boost!

SETTING YOUR GAIN CORRECTLY

SETTING YOUR GAIN CORRECTLY

In order to get the cleanest signal possible when you record, it is recommended that you set the gain on your camera quite low, around 1 or 2. These devices generally have poor-quality, noisy preamps. With any VideoMic, the best results are generally achieved when the camera preamp is being driven as little as possible, instead using the microphone controls to achieve the levels you need.

SETTING YOUR GAIN CORRECTLY

The powerful variable gain control makes the VideoMic NTG extremely versatile in this respect.

We’ve designed the output level of the VideoMic NTG to be similar to the VideoMic Pro+ when the gain knob is set to 10. This is the best place to start with any device. Adjust the level up or down from there, keeping an eye on the level meter on your device to make sure it isn’t peaking and isn’t too low. It should be sitting just under the yellow section when the sound source is at its loudest.

If possible, we recommend that you monitor your audio on headphones when recording to ensure it is not distorting. If your audio is distorted there’s not much you can do in post-production to clean it up, and your take could be ruined. Most cameras have a headphone output you can use for this purpose.

If you set the gain as described above and it still sounds as if the audio is distorting, even if the level meters on your cameras are not peaking, it could be that the output level of the VideoMic NTG is too high for your camera to handle, even with its gain turned down. To fix this, turn down the output of the VideoMic NTG down slightly, and turn up the gain on your camera to compensate.

RECORDING LOUD SOUND SOURCES

RECORDING LOUD SOUND SOURCES

The VideoMic NTG has a number of features that make it possible to record very loud sound sources and still maintain a clean, distortion-free signal.

RECORDING LOUD SOUND SOURCES

The first of these is the variable gain control. The VideoMic NTG has a very wide output range, allowing you to tailor your levels to just about environment and recording device. When recording loud sound sources, we recommend starting with the gain set to 10 and dialling it back from there, keeping an eye on your device’s level meter.

There is also a safety channel, which will record a second track onto your device at -20dB in case the main channel distorts, allowing you to swap it out in post-production. An absolute lifesaver!

Another useful feature is the -20dB pad. This will prevent the internal circuitry of the VideoMic NTG clipping when recording loud sounds. When recording very loud sound sources, we recommend engaging the pad. This might be a very loud source at a distance (for example, a rock concert), or it could be a more moderate sound that is very close to the microphone. This includes doing a voice-over with the mic close to your mouth, if are speaking in a strong voice. There is a handy dB peak warning light, which will flash red when your microphone’s input is clipping, so keep an eye on when recording. If it starts to flash, engage the -20dB pad.

You can also use the -20dB pad at the same time as the safety channel (which records a second track at -20dB). But why would you want to do this? Wouldn’t they essentially be recording both channels at the same level?

Well, the pad is a true pad, meaning it will attenuate the incoming signal so that the capsule itself does not distort. The safety channel, on the other hand, attenuates the output of the second channel at -20dB. So, if you are recording something loud like a rock show, the pad will ensure the microphone does not distort. The safety channel will then ensure if the concert gets unexpectedly louder (for example a roar from the crowd), you will have a back-up track at a lower volume if the main audio track hits the end-stop of the meter in your device and distorts. Having both engaged is a failsafe way to ensure you always have a clean signal in unpredictable noisy environments.

RECORDING VIA USB

RECORDING VIA USB

The ability to record directly into a computer or mobile device via USB sets the VideoMic NTG apart from all other mics out there. It is a class-compliant USB device, meaning you don’t need drivers or software for it to work. Simply plug it into your device, set it as your input source in your system preferences or recording software settings, and hit record.

RECORDING VIA USB

You can also monitor your audio with headphones using the 3.5mm output (just remember to set the VideoMic NTG as your output device) and control the output level using the variable gain control, which is capable of driving even high-impedance headphones. This is perfect for recording voiceovers, podcasts, live streaming, voice calls and more.

When using the VideoMic NTG as a desktop USB mic, we recommend placing it around 15cm from your mouth. Note that both the pad and safety channel work as normal in USB audio mode, so can be useful when recording voice-overs or loud sound sources. See the section above for details.

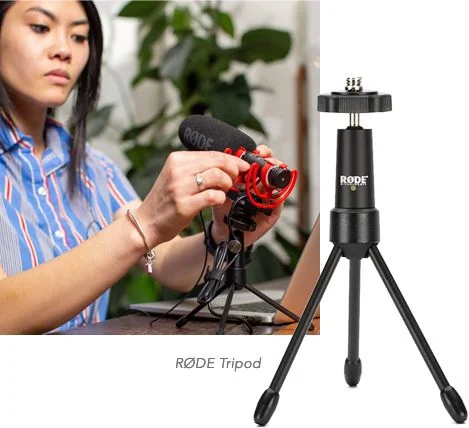
The microphone’s cold shoe has a standard 3/8” thread for mounting onto a desk stands, such as the RØDE Tripod.  

What is the VideoMic NTG’s auto-power feature?

The auto-power feature was first introduced to the VideoMic range with the VideoMic Pro+. It is a handy function that automatically turns the microphone off when it detects that the camera is switched off, helping conserve battery life, and turns it on when the camera is turned on, so that you never have to worry about missing a take. The auto-power function only works if your camera delivers plug-in power (most do), as this is what tells the microphone if it is on or off, or if you are using the microphone in USB audio mode. The VideoMic NTG also features a power button, so that it can be manually powered on and off. Check out our list of cameras that deliver plug-in power here.

What does the auto-sensing feature do?

The auto-sensing output is an intelligent feature that seamlessly detects whether your microphone is plugged into a TRS input, like those on most cameras, or a TRRS input, which most smartphones and tablets have, and switches the output to accommodate. This means you don’t have to worry about using TRS to TRRS adaptor cables – the SC10 cable that accompanies the VideoMic NTG will work seamlessly with any device. However, if your device has a Lightning®  connector or anything other than a 3.5mm input, you will need to use an adaptor.

What does the infinitely variable gain control do?

The infinitely variable gain control is a knob on the rear of the microphone that allows you to precisely tailor the output level to your recording device. This is an active control that has a greater output range than any other microphone on the market – it can deliver anything from mic level signal all the way to a headphone level output, which is particularly useful when using the 3.5mm jack as a headphone output. Where other microphones simply employ a pad to adjust the output, the VideoMic NTG’s control also actively amplifies the signal at various gain stages, resulting in a cleaner audio with a vastly improved signal-to-noise ratio (it essentially does all the hard work so your camera’s lower-quality internal preamp doesn’t have to, lowering the noise floor of your signal).

How long does it take for the battery to fully recharge?

2 hours from empty to full.

How should I set the output level of the VideoMic NTG?

When connected to a camera or smartphone, we recommend you turn down the gain of your camera to, or close to, its lowest setting, and turn off any automatic gain controls that may be activated. Then, starting from the lowest setting, turn up the infinitely variable gain control on the VideoMic NTG until your meters are showing a good level (usually just starting to touch the yellow, or about halfway) when recording your expected sound source. Where possible, monitor your audio using headphones, to ensure your sound is clean and clear.

What are the physical controls and lights on the VideoMic NTG and how do they work?

There are three physical controls on the VideoMic-NTG:

  • The first is the infinitely variable gain control on the rear of the mic, which delivers a wide output range (numbered 1–15). You can use this to precisely tailor the output level to best match for your device.
  • The next button is the power/function control. By default, the mic will auto-power on when connected to a device and power off when disconnected from a device, but you can also turn the mic on/off manually by holding this button for three seconds. A single press on this button will engage the -20dB pad (left LED illuminates), another press will engage the safety channel (left LED off, middle LED illuminates), and third press will engage both functions (left and middle LEDs illuminate). A final press will disengage both functions. The right LED is the dB peak warning light, which will illuminate red when the mic’s internal preamp is clipping, at which point the pad should be engaged.
  • The final button is the filter control. Pressing this once will engage the 75Hz high-pass filter (left Led illuminates). Pressing it again will select the 150Hz filter (middle LED illuminates). A third press will disengage the high-pass filters (left and middle LEDs off). A long press (3 seconds) will engage the high frequency boost (right LED illuminates). This can be used in conjunction with the high-pass filters. Another long press will disengage the high boost.
  • There is also battery power status indicator. Green indicates the battery is fully charged, amber indicates medium charge, red indicates low charge, and blinking red indicates very low charge.
  • This LED also indicates charging status when the mic is connected to a power source. When connected to a computer, green indicates it is fully charged; blue indicates it is charging. When connected to a power bank or USB power adapter, the LED maintains the red/amber/green behaviour above. If the power LED triple blinks red, this means that mic has detected it is outside its operating temperature range. 

What is the VideoMic NTG’s noise floor?

The VideoMic NTG has extremely low self-noise for a microphone of this type (15dBA). All the RØDE VideoMics have extremely low self-noise; in fact, the VideoMic Pro and VideoMic Pro+ are actually slightly quieter than the VideoMic NTG. It’s worth comparing the VideoMic NTG to other on-camera microphones for reference as to how quiet all RØDE microphones are.

With other VideoMics, it is recommend that I lower the gain on my camera as much as possible and use the gain controls on the mic to boost the signal. Is this still the recommended setting on the VideoMic NTG?

Yes, this is the same for the VideoMic NTG. We’ve designed the output level to be similar to the VideoMic Pro+ when the gain knob is set to 10. This is the best place to start with any device, and adjust the level up or down from there. With any VideoMic, the best results are generally achieved when the camera preamp is being driven as little as possible.

Does the VideoMic NTG have a standby mode?

There isn’t a standby mode on the VideoMic NTG, it’s either off and not drawing any power, or it’s completely on. When the microphone is off it will last months without the need to charge.

When the safety channel is engaged on the VideoMic NTG, is any difference between the two channels?

There is no difference in the sonic characteristics of the safety channel, it is just 20dB lower than the main channel. However, when you boost the safety channel in post-production, you may notice some preamp noise from your camera, which may affect the perceived audio quality. The safety channel should ideally be used to replace the small piece of audio that has clipped, and it’s best to blend the audio in and out quickly to reduce any noticeable quality change.

The VideoMic NTG has great radio interference (RF) rejection. How is this achieved?

All RØDE microphones are tested extensively for interference from a wide range of devices. We make sure that the bodies are extremely well shielded and that the electronics aren’t susceptible to interference. Our state of the art RF test facilities allow us to put microphones through a wide range of RF simulations, which ensures our designs are robust and highly resistant to RF interference.

Is the VideoMic NTG’s battery user-replaceable?

The internal battery is not user-replaceable, however, the VideoMic NTG has a 10-year warranty once it has been registered. If there are any issues with the battery within this time frame, simply contact the RØDE support team and we’ll happily help out. 

Does the safety channel work with smartphones?

No. The VideoMic NTG’s safety channel does not function with devices with a TRRS input as they only support one channel of audio.

Will the VideoMic NTG work with my computer or tablet PC?

The VideoMic NTG is a class-compliant device and will work directly with your computer or tablet PC. As a class-compliant USB device, you don’t need drivers or software for it to work. Simply plug it into your device, set it as your input source in your system preferences or recording software settings, and hit record.

Will the VideoMic NTG work with my Android smartphone?

The VideoMic NTG is compatible with most Android smartphones that have USB-C. Compatibility depends on your smartphone manufacturer.